Welcome to Day 6 of the TerraWeek! 🚀 In today's tasks, we will explore Terraform providers and their role in interacting with different cloud platforms or infrastructure services. We will also dive into provider configuration, authentication, and hands-on practice using providers for platforms such as AWS, Azure, Google Cloud, or others.
Task 1: Learn and Compare Terraform Providers
Terraform provider is like a bridge or connector that allows Terraform to interact with and manage resources in a specific cloud or infrastructure platform.
Imagine you're building a house (your infrastructure) and you need materials from a hardware store (the cloud platform). The hardware store (provider) provides you with everything you need, like wood, nails, and paint, to build your house according to your plans (Terraform configuration).
Similarly, terraform providers give you access to resources like virtual machines, databases, storage buckets, networking components, and more, so you can define, create, update, and delete them using Terraforms simple configuration language.
Each cloud provider, such as AWS, Azure, Google Cloud, or a service provider like Docker or Kubernetes, has its own Terraform provider. These providers translate your Terraform code into API calls that interact with the respective cloud or infrastructure platform to provision and manage resources as specified in your configuration.
AWS (Amazon Web Services) Provider:
The AWS provider in Terraform allows you to manage resources in Amazon Web Services (AWS) cloud infrastructure. With the AWS provider, you can create, update, and delete various AWS resources such as EC2 instances, S3 buckets, VPCs, IAM roles, and more.
Here's an example of how to use the AWS provider in a Terraform configuration:
# Specify the AWS provider and region
provider "aws" {
  region = "us-east-2"
}

# Create an EC2 instance
resource "aws_instance" "example" {
  ami           = "ami-12345678"   # AMI ID of the instance
  instance_type = "t2.micro"        # Instance type
  key_name      = "my-keypair"      # Key pair for SSH access

  tags = {
    Name = "ExampleInstance"
  }
}
In this example:
We first declare the AWS provider using the
providerblock. We specify the AWS region where the resources will be provisioned.Then, we define an EC2 instance using the
aws_instanceresource block. We specify the AMI ID, instance type, and other attributes such as key pair and tags.The
tagsattribute allows us to add metadata to the instance, such as a name tag for easy identification.
To use this Terraform configuration:
Save the configuration to a file, e.g.,
main.tf.Run
terraform initto initialize the working directory and download the AWS provider plugin.Run
terraform planto preview the changes Terraform will make.Run
terraform applyto apply the changes and create the EC2 instance in your AWS account.
Azure Provider:
The Azure provider in Terraform enables you to manage resources in Microsoft Azure cloud infrastructure. With the Azure provider, you can define, create, update, and delete various Azure resources such as virtual machines, storage accounts, databases, virtual networks, and more.
Here's an example of how to use the Azure provider in a Terraform configuration:
# Specify the Azure provider and authentication
provider "azurerm" {
  features {}
}

# Create a resource group
resource "azurerm_resource_group" "example" {
  name     = "example-resources"
  location = "East US"
}

# Create a virtual network
resource "azurerm_virtual_network" "example" {
  name                = "example-network"
  address_space       = ["10.0.0.0/16"]
  location            = azurerm_resource_group.example.location
  resource_group_name = azurerm_resource_group.example.name
}

# Create a subnet within the virtual network
resource "azurerm_subnet" "example" {
  name                 = "example-subnet"
  address_prefixes     = ["10.0.1.0/24"]
  virtual_network_name = azurerm_virtual_network.example.name
  resource_group_name  = azurerm_resource_group.example.name
}
In this example:
We declare the Azure provider using the
providerblock. Thefeatures {}block is empty but can be used to enable specific provider features if needed.We create an Azure resource group using the
azurerm_resource_groupresource block. The resource group serves as a logical container for grouping Azure resources.We create a virtual network using the
azurerm_virtual_networkresource block. This virtual network provides connectivity for Azure resources.We create a subnet within the virtual network using the
azurerm_subnetresource block. Subnets partition the virtual network into smaller, more manageable sub-networks.
To use this Terraform configuration:
Save the configuration to a file, e.g.,
main.tf.Run
terraform initto initialize the working directory and download the Azure provider plugin.Run
terraform planto preview the changes Terraform will make.Run
terraform applyto apply the changes and create the Azure resources in your Azure account.Google Cloud provider:
The Google Cloud provider in Terraform enables you to manage resources in Google Cloud Platform (GCP) infrastructure. With the Google Cloud provider, you can define, create, update, and delete various GCP resources such as virtual machines, storage buckets, databases, networks, and more.
Here's an example of how to use the Google Cloud provider in a Terraform configuration:
 # Specify the Google Cloud provider and authentication
 provider "google" {
   credentials = file("path/to/credentials.json")
   project     = "your-project-id"
   region      = "us-central1"
 }

 # Create a virtual machine instance
 resource "google_compute_instance" "example" {
   name         = "example-instance"
   machine_type = "n1-standard-1"
   zone         = "us-central1-a"

   boot_disk {
     initialize_params {
       image = "debian-cloud/debian-10"
     }
   }

   network_interface {
     network = "default"
     access_config {}
   }
 }
In this example:
We declare the Google Cloud provider using the
providerblock. We specify the credentials file, project ID, and region where the resources will be provisioned.We create a Google Compute Engine instance using the
google_compute_instanceresource block. We specify the instance name, machine type, zone, boot disk image, and network interface configuration.
To use this Terraform configuration:
Save the configuration to a file, e.g.,
main.tf.Replace
"path/to/credentials.json"with the path to your Google Cloud service account credentials JSON file.Replace
"your-project-id"with your Google Cloud project ID.Run
terraform initto initialize the working directory and download the Google Cloud provider plugin.Run
terraform planto preview the changes Terraform will make.Run
terraform applyto apply the changes and create the Google Cloud resources in your GCP project.Task 2: Provider Configuration and Authentication
provider configuration:
In Terraform, provider configuration is used to specify the details of the infrastructure provider you want to interact with. It includes authentication details, such as credentials, project IDs, regions, and any other required configuration settings for the provider.
Here's a breakdown of a provider configuration with an example:
 provider "aws" {
   region     = "us-west-2"
   access_key = "your-access-key"
   secret_key = "your-secret-key"
 }
In this example:
providerdeclares the start of a provider configuration block."aws"specifies the name of the provider. In this case, it's the AWS provider for Amazon Web Services.regionspecifies the AWS region where resources will be managed. In this example, it's set to"us-west-2".access_keyandsecret_keyare used for AWS authentication. These are your AWS access key and secret key, which provide access to your AWS account.Note: It's generally recommended to use environment variables or other secure methods to manage access credentials, rather than hardcoding them in your Terraform configuration.
Authentication mechanisms in Terraform:
In Terraform, there are several authentication mechanisms available to authenticate with cloud providers and other services. These mechanisms vary depending on the provider and the authentication requirements. Here are some common authentication mechanisms used in Terraform:
Static Access Keys: This mechanism involves providing static access keys directly in the Terraform configuration. While this is straightforward, it's generally not recommended for production use due to security concerns. Here's an example using AWS:
 provider "aws" {
   region     = "us-west-2"
   access_key = "your-access-key"
   secret_key = "your-secret-key"
 }
Environment Variables: Terraform can read credentials from environment variables, providing a more secure way to authenticate without exposing sensitive information in the configuration files. For example, with AWS:
 export AWS_ACCESS_KEY_ID="your-access-key"
 export AWS_SECRET_ACCESS_KEY="your-secret-key"
Terraform will automatically use these environment variables for authentication.
Shared Credentials File: Terraform can also use the shared credentials file used by other AWS SDKs and CLI tools. By default, this file is located at
~/.aws/credentials. Here's an example of a credentials file:[default] aws_access_key_id = your-access-key aws_secret_access_key = your-secret-keyTerraform will automatically read credentials from this file if no other authentication method is specified in the configuration.
Configuring AWS Credentials:
Before you can provision resources on AWS using Terraform, you need to configure your AWS credentials. Follow these steps to configure AWS credentials on your system:
• Step 1: Create an IAM User: If you haven't already created an IAM user with the necessary permissions, you can do so by following these steps:
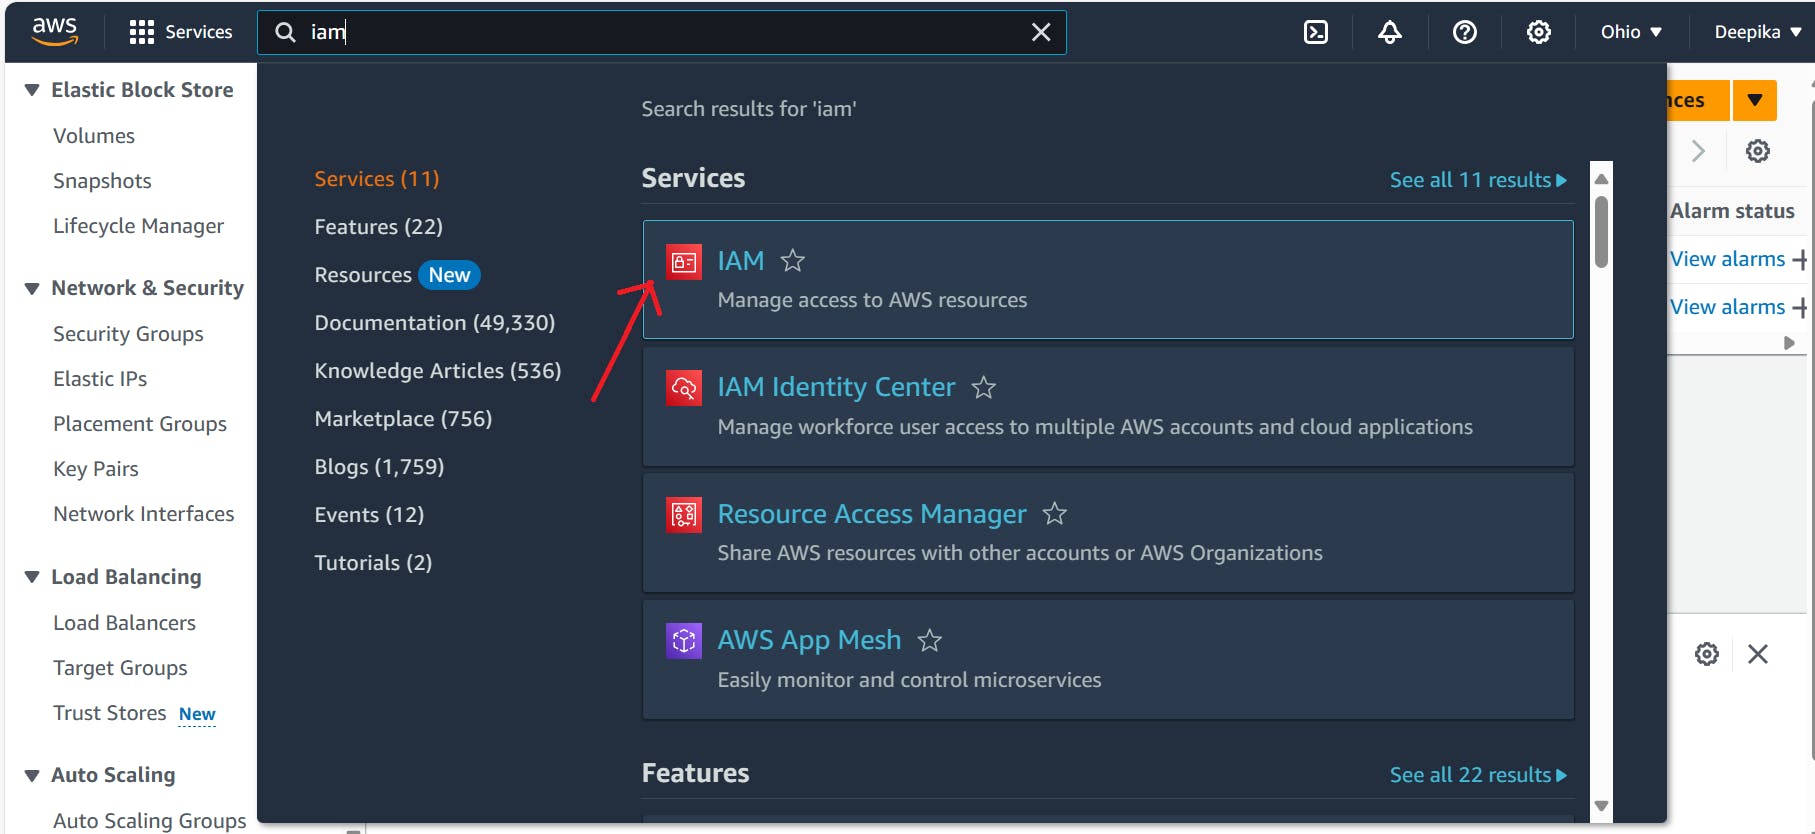
• Log in to the AWS Management Console and navigate to the IAM service.

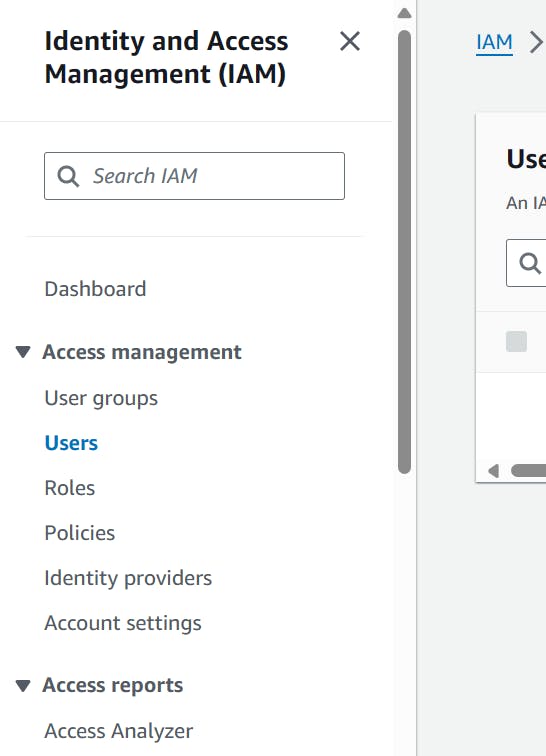
• Click on "Users" in the left sidebar and then click on "Add user."

• Enter a username for the IAM user (e.g., terra-user) and select "Programmatic access" as the access type.
• Click on "Next: Permissions" and attach the appropriate permissions policies to the IAM user.

• We can attach the "AmazonEC2FullAccess" policy to allow the user to manage EC2 instances.

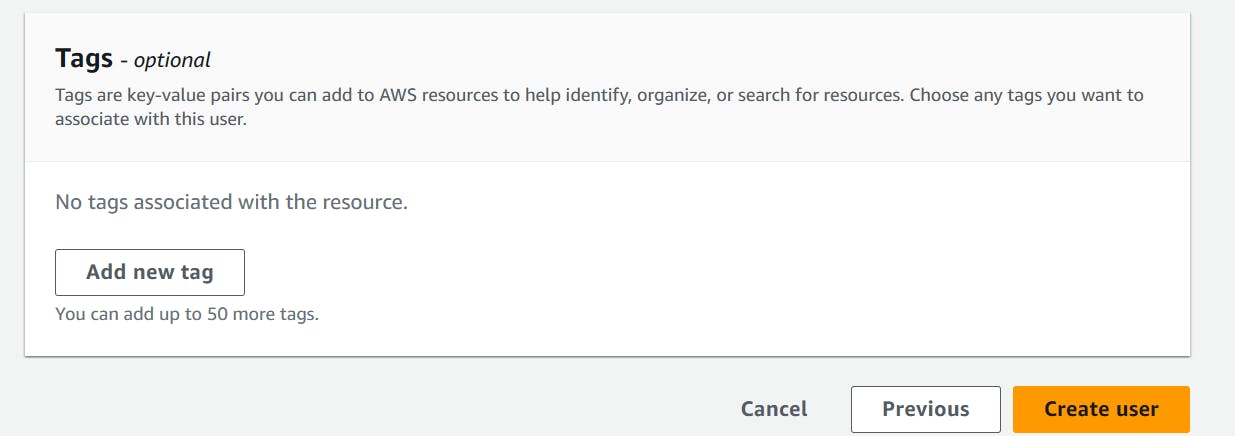
• Click on "Next" and add any tags if necessary.

• Click on "Create user" and user created successfully.

• Retrieve IAM User Credentials: After creating the IAM user, you'll be provided with an access key ID and secret access key. Make sure to save these credentials securely as they will be used to configure AWS CLI.

• Install AWS CLI: If you haven't already installed the AWS CLI, you can do so by following the instructions in the AWS documentation.
                 curl "https://awscli.amazonaws.com/awscli-exe-linux-x86_64.zip" -o "awscliv2.zip"
                  unzip awscliv2.zip
                  sudo ./aws/install


• Configure AWS CLI: Run the following command to configure the AWS CLI with the IAM user's access key ID and secret access key:
aws configure• Follow the prompts to enter your AWS access key ID, secret access key, default region, and output format.

Task 3: Practice Using Providers
Objective: Gain hands-on experience using Terraform providers for your chosen cloud platform.
"Here we are going to practice Terraform Provider on AWS platform. The best way to learn something is to practice more and more on it."
Create a Terraform Configuration File:
Create a
main.tffile in the directory.Terraform resource blocks to establish the EC2 instance, VPC, security group, internet gateway, and route table:
  # create a ec2 instance

  resource "aws_instance" "my_app_instance" {
   ami = "ami-0b8b44ec9a8f90422"
   instance_type = "t2.micro"
   tags = {
     Name = "my_instance"
    }
  }

  # create a VPC

  resource "aws_default_vpc" "default_vpc" {
   }

  # create a security group

  resource "aws_security_group" "allow_entry" {
   name = "allow_entry"
   vpc_id = aws_default_vpc.default_vpc.id

   ingress {
   description = "adding inbound rules"
   protocol = "TCP"
   from_port = 22
   to_port   = 22

   cidr_blocks = ["0.0.0.0/0"]
   }
   tags = {
     Name = "allow_entry"
  }
  }

  # Create Internet Gateway and Attach it to VPC

  resource "aws_internet_gateway" "internet_gateway" {
    vpc_id = aws_default_vpc.default_vpc.id
    tags = {
      Name = "terraweek_day6_internet_gateway"
    }
  }

  # Create Route Table and Add Public Route

  resource "aws_route_table" "public-route-table" {
    vpc_id = aws_default_vpc.default_vpc.id
    route {
      cidr_block = "0.0.0.0/0"
      gateway_id = aws_internet_gateway.internet_gateway.id
    }
    route {
      ipv6_cidr_block = "::/0"
      gateway_id      = aws_internet_gateway.internet_gateway.id
    }
    tags = {
      Name = "terraweek-day6-Public Route Table"
    }
  }
Create a
provider.tffile:terraform { required_providers { aws = { source = "hashicorp/aws" version = "~> 5.0" } } } # Configure the aws provider provider "aws" { region = "us-east-2" }
This configuration ensures that terraform will use version 5.x of the AWS provider and sets the default region for AWS operations to
us-east-2.Run
terraform initcommand.
Run
terraform plancommand.

Run
terraform applycommand.

Run terraform destroy command.


With the completion of Day 6, we understood the concept of terraform provider. we have also done hands on project on this topic.
Hope you found this article informative and useful. Thanks for reading this article.
Keep Learning...
